-
Procedure
Culture plate
Inoculation and streaking
Agar plates are commonly used in routine diagnostic microbiology. Selective media are chosen to allow the organism(s) of interest to grow, while reducing the growth of unwanted commensals.Agar plates are inoculated with clinical material, and then ‘streaked’. Streaking is a process that dilutes the original inoculum and results in the separation of organisms and the subsequent growth of discrete colonies. Single isolated colonies are the aim. This process allows individual colonies to be examined, subcultured if necessary, identified and tested for antimicrobial sensitivity.
Equipment
Prepare the following equipment:
- culture plate correctly labelled with client identification and specimen site
- inoculation loop
- heat source (optional)
- incubator.
Procedure
- Label plate with client identification according to clinic protocol and specimen site.
- Inoculate plate to the size of a 20 cent coin near the edge of the agar plate without touching sides of plate.
- Heat the ‘loop’ to sterilise, if using metal nonsterile loop.
- Allow to cool.
- Streak out the inoculum over the plate, taking care to
- streak evenly
- not touch the sides of plate
- not dig into the agar.
- Heat the loop again to decontaminate (sterilise).
- Place the plate into appropriate 37° incubator. The majority of sexual health specimens requiring incubation are incubated in carbon dioxide.
- Incubate overnight or according to local policy.
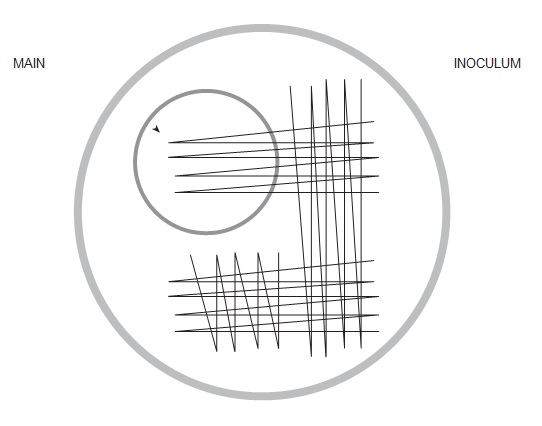
Figure 4.7: Stylised image of inoculation of culture plate
Gram stain
The Gram stain allows the division of bacteria into two main groups, those that are gram-positive (dark purple) and those that are gram-negative (light red). The ability of gram-positive bacteria to retain the purple colour reflects the thickness of their peptidoglycan-containing cell wall, which far exceeds that of gram-negative bacteria.
Some bacteria cannot be classified using a Gram stain, either because they lack cell walls (Mycoplasma species), or because they are too small (Chlamydia species).
Gram staining consists of four components:
- Primary stain (crystal violet, methyl violet or gentian violet)
- Mordant (Gram’s iodine)
- Decolouriser (ethyl alcohol, acetone or 1:1 ethanol and acetone mixture)
- Counterstain (dilute carbolfuchsin, safranin or neutral red).
The primary stain renders all the bacteria uniformly violet. The addition of Gram’s iodine results in formation of a dye–iodine complex in the cytoplasm. Gram-positive bacteria retain purple iodine–dye complexes after the treatment with the decolourising agent.
Gram-negative bacteria do not retain complexes when decolourised. The use of a red counterstain allows visualisation of decolourised gram-negative bacteria.
The ability to obtain a good Gram-stained smear depends on appropriate sample collection and producing an evenly spread specimen that is correctly fixed, stained and decolourised.
Sites for specimen collection for Gram staining may include male urethral, vaginal, endocervical, subpreputial and rectal.
Equipment
- heat source
- glass slide
- crystal violet
- Gram’s or Lugol’s iodine
- acetone or ethanol
- carbolfuchsin or safranin counterstain
- blotting paper
- immersion oil for microscope
- lens tissue for microscope.
Procedure
- Put on personal protective equipment: gown, gloves and goggles.
- Label slide before collecting specimen.
- Sample from the correct site, making a thin film on a clean glass slide, using a sterile loop or swab.
- Register specimen according to laboratory requirements.
- Air dry.
- Heat-fix the specimen on the glass slide by passing the uninoculated side of the slide over the heat source. The slide should not become too hot to touch.
- Flood the slide with crystal violet and allow it to stand for at least 15 seconds. Rinse the slide under tap water.
- Flood slide with iodine and allow it to stand for at least 15 seconds. Rinse with water.
- Carefully decolourise with acetone or ethanol 95% until the thinnest parts of the smear are colourless. Rinse the slide with tap water.
- Flood the slide with carbolfuchsin or safranin and allow it to stand for at least 15 seconds. Rinse the slide with tap water.
- Carefully blot the slide dry with the blotting paper or dry with the heat source (e.g. Bunsen burner).
Interpretation
- Determine where the stain material is located and place the slide (inoculated side up) on the microscope stage.
- Scan the slide on low power (× 10) to locate a representative area of the slide.
- Look for polymorphonuclear leukocytes (PMNs or polymorphs). At low power, these can usually be differentiated from epithelial cells, thus enabling the examiner to focus on the area containing a predominance of inflammatory cells. At low power, large fungal forms (all are gram-positive) can also often be seen.
- After selecting an area of interest, apply a drop of immersion oil to the slide and read the slide in a minimum of five fields on high power (× 100).
- Remove the slide from the microscope stage and clean the oil from the lens.
- Dispose of the slide into sharps bin or store for teaching or auditing purposes according to local clinic policy.
Documentation
Documenting Gram stain findings Include presence or absence of: Diagnostic Polymorphonuclear leukocytes Quantify if present as per laboratory requirements, for example: 10 polymorphs over 5 high-power fields If endocervical specimen, suggestive of cervicitis Nongonorrhoeal urethritis: see below
If anoscopy-collected, mucopus suggestive of proctitis
Gonococci Gram-negative diplococci seen in the cytoplasm of some of the polymorphs Gram stain of urethral secretions in symptomatic men that demonstrates polymorphonuclear leukocytes with intracellular gram-negative diplococci is diagnostic Depending on the site of specimen collection of the Gram-stained slide, also report on: Clue cells Usually representing at least 20% of vaginal epithelial cells. Squamous vaginal epithelial cells that are covered with bacteria with the borders of the cells obscured owing to the presence of small rods or cocci.3 Suggestive of bacterial vaginosis Lactobacilli The vaginal flora of healthy women consists primarily of lactobacilli that appear as gram-positive bacilli which produce lactic acid and protect the vagina from microbial infections4 Hyphae with or without yeast spores Suggests a diagnosis of candidal vaginitis or candida balanitis, depending on site Other e.g. spermatozoa Wet film
The phase-contrast microscope is used for viewing wet films of vaginal discharge specimens and is especially useful in identifying Trichomonas vaginalis.
Use of phase-contrast microscopy improves contrast differences between cells and the surrounding medium by creating a dark image on a light background, making it possible to see cells without staining them.
The phase-contrast microscope is preferable to bright field microscopy when high magnifications are needed, or when the specimen is colourless or has fine details which do not show up colour well. Most living microscopic organisms are much more obvious in phase contrast.
The vaginal flora of healthy women consists primarily of lactobacilli that produce lactic acid and protect the vagina from microbial infections. In many women, small numbers of other bacteria such as anaerobes and Gardnerella vaginalis are also present.
Infection of the vagina falls into two categories: vaginitis, caused by T. vaginalis and Candida spp., and bacterial vaginosis, which is associated with a mixed bacterial flora and a lack of lactobacilli, but is of uncertain aetiology. Microscopy is often the method chosen for diagnosing vaginitis and vaginosis because of its speed and specificity.
Equipment
- glass slide
- cover slip
- pencil
- cotton-tipped swab
- normal saline.
Procedure
- Label glass slide with client details as per local protocol, site and date.
- Insert a cotton-tipped swab into the vagina and collect discharge from the posterior fornix.
- Gently tap the swab into a drop of saline on a glass slide.
- Place the cover slip over the sample.
- Register specimen according to laboratory requirements.
- Examine slide immediately after collection.
- Scan the slide on low power (× 10) to locate a representative area of the slide; change to high-power objective (× 40).
- Systematically scan the specimen beneath the entire cover slip, reading the slide in a minimum of five fields.
- Remove the slide from the microscope stage.
- Dispose of slide into sharps bin.
- Clean the microscope stage if needed.
- Document findings as per local laboratory and clinic requirements.
Documentation
Document presence or absence of: Diagnostic of Trichomonads Trichomoniasis Trichomonads are protozoa, generally ovoid in shape and recognised by their jerky, swaying movement by means of flagellae Clue cells Bacterial vaginosis + clinical indicators
Usually representing at least 20% of vaginal epithelial cells. Squamous vaginal epithelial cells that are covered with bacteria with the borders of the cells obscured owing to the presence of small rods or cocci. Lactobacilli Nil The vaginal flora of healthy women consists primarily of lactobacilli which produce lactic acid and protect the vagina from microbial infections Hyphae with or without yeast spores Candidiasis Suggests a diagnosis of candidal vaginitis Polymorphonuclear leukocytes >40 per 40× field is consistent with pelvic inflammatory disease Other e.g. spermatozoa, red blood cells Rapid HIV testing
For details of performing rapid HIV testing see
Framework and standard operating procedure for the provision of point of care testing for HIV in clinical and non-clinical settings. North Sydney: NSW Ministry of Health; 2015. Available at: http://www1.health.nsw.gov.au/pds/ActivePDSDocuments/GL2015_018.pdf
Pregnancy testing
History
Obtain relevant history:
- date and nature of last menstrual period. (A pregnancy test is preferably performed when the client is seven or more days overdue, but may be performed earlier if clinically indicated.)
- signs and symptoms of pregnancy e.g. breast changes, nausea and vomiting
- dates of unprotected sexual intercourse since last menstrual period
- concerns and feelings about the result
- whether the sexual intercourse was consensual
- current medications
- obstetric history (as appropriate).
Equipment
Prepare the following equipment:
- pregnancy testing kit
- urine specimen
- gloves.
Procedure
Instruct client to pass urine into specimen jar. An early-morning specimen is ideal, but urine may be collected at any time. Perform urine human chorionic gonadotrophin (hCG) testing following instructions on the pregnancy test kit, including evaluation of test result.
Negative test result
If test is negative but pregnancy is suspected, repeat in one week. Indications for a repeat test:
- too soon to detect a pregnancy, within seven days of missed period (particularly if not performed on early-morning specimen)
- signs and symptoms of pregnancy
- initial test was performed within the first two or three weeks of missed or late use of hormonal contraception.
Discuss future contraceptive options.
Positive result
If the result is positive:
- discuss options including termination
- provide immediate support
- provide appropriate referral (e.g. Family Planning NSW) and follow-up plan.1
Serum hCG testing
Serum hCG testing offers little advantage over urine hCG testing except the ability to provide quantitative results or when an abnormal or ectopic pregnancy is suspected. However, if pregnancy is clinically suspected and urine testing is repeatedly negative, a serum hCG may be useful.A serum hCG over 5 mIU/mL but under 25 mIU/mL may indicate:
- early pregnancy
- miscarriage
- blighted ovum
- ectopic pregnancy
- pituitary hCG
- persistent trophoblastic disease
- nontrophoblastic tumour
- false positive hCG.
Repeat serum quantitative hCG in two or three days.
An abnormal rise or no change indicates an abnormal pregnancy or other health problem; consult with a medical officer.
References
- Family Planning NSW. Reproductive & sexual health: an Australian clinical practice handbook. 3rd ed. Ashfield (NSW): FPNSW; 2016.
- NSW Health. Infection prevention and control policy. Sydney: NSW Health; 2017. Available at: http://www1.health.nsw.gov.au/pds/ActivePDSDocuments/PD2017_013.pdf
- Hand Hygiene Australia. Blood collection hand hygiene practice guidelines. Heidelberg (VIC): Hand Hygiene Australia; 2011. Available at: https://www.hha.org.au/component/jdownloads/send/19-guidance-documents/50-blood-collection
Urine dipstick analysis
Patient to collect mid-stream urine in clean sterile container.
If sample to be sent to laboratory for further testing, then remove small amount of urine using a sterile syringe and apply over the dipstick, ensuring coverage.
Read dipstick horizontally, comparing it to chart on bottle.
Documentation
Document all laboratory and clinical findings in the medical record including batch number if using a point-of-care test. Refer to Documentation under Wet film and Documentation under Gram stain.
References
- NSW Health. Infection prevention and control policy. Sydney: NSW Health; 2017. Available at: http://www1.health.nsw.gov.au/pds/ActivePDSDocuments/PD2017_013.pdf
- Ison CA, Savage M, Taylor-Robinson D (editors). Microscopy for sexually transmitted infections. London: Harcourt Health Communications; 2001.
- South Eastern Area Laboratory Services (SEALS). Information sheets for medical practitioners and staff. Available at: http://www.seals.health.nsw.gov.au/information-sheets/.aspx